
Somewhere along the way I let these lapse. Now they should work again. And I may add some new patterns.
Friday, November 26, 2021


Wednesday, December 5, 2018
San Francisco Chess Set
I love the NYC chess set available at the Met but I don't love NY. San Francisco has iconic buildings and would make a great chess set. However, I don't have a 3D printer and I'm not much of a sculptor...maybe drawings?
King: Transamerica building
Queen: City Hall
Bishops: Misson San Francisco or St. Mary's Cathedral
Knights: Cable Car on hill
Rooks: Coit Tower
Pawns: Painted Lady house
King: Transamerica building
Queen: City Hall
Bishops: Misson San Francisco or St. Mary's Cathedral
Knights: Cable Car on hill
Rooks: Coit Tower
Pawns: Painted Lady house
Tuesday, May 8, 2018
2018 Met Gala!
Yeah, I don't really follow this stuff, but when fashion gets this crazy, I can't ignore it.
Best Match to Theme:
Missed the Point:
There were several metallic gold dresses: Kerry Washington, Olivia Munn, Emily Ratajkowski, etc. which were just kinda bland. Halo or sunburst headdresses helped with the theme. Also too many "pretty ball gowns" that looked historical without context.
Best Match to Theme:
 |
Zendaya - Space Age Joan of Arc
|
Best Dress Overall:
 |
| Amal Clooney - Floral Peacock |
 |
| Kim Kardashian West - Slap a Cross on It |
Wednesday, December 13, 2017
Kitschy Christmas Mugs
I've been seeing vintage Christmas mugs with vintage Christmas decorations in them all over Pinterest. I just love kitschy retro Christmas decorations! So when I saw that Pottery Barn was selling reproduction mugs, I decided to give it a try.
I figured that I would use either vintage or new-but-look-vintage items to make my own. I wasn't very successful in finding bottle-brush trees or other little decorations. I ended up using Christmas-themed floral bits and some plastic Christmas tree balls with a Styrofoam tree form.
Materials:
Rudolf took slightly more effort.
Materials:
I figured that I would use either vintage or new-but-look-vintage items to make my own. I wasn't very successful in finding bottle-brush trees or other little decorations. I ended up using Christmas-themed floral bits and some plastic Christmas tree balls with a Styrofoam tree form.
Materials:
- Snowman Christmas mug
- Christmas-themed floral pieces
- scissors
For Frosty Mug, I just trimmed and arranged the greenery. I didn't even add a bow or anything. Easiest craft ever!
 |
| Frosty Mug |
Materials:
- Reindeer mug
- Styrofoam cone, I picked white for some reason, but it showed through so I had to spray paint it green. Next time, I start with a green cone
- Assorted plastic or glass Christmas tree balls
- Glue gun
The cone I chose, was a good height and width, but the base was a little large to fit in the mug. I carved a bit off the bottom of the cone so that it fit in the mug and around Rudolf's ears.
As I mentioned above, painting the cone to match the color of the balls helps to hide it. Use the hot glue gun to attach the balls to the cone. Small balls make it easier to get good cone coverage.
 |
| Rudolf in progress |
I did not glue the cone to the mug so that the mug could be used for other purposes or redecorated.
 |
| Rudolf from the front |
 |
| Rudolf from the back |
Friday, March 10, 2017
Fitbit Pendant
What to do when your pants don't have pockets and you don't want to clip your fitness tracker to your shirt collar?
I've seen some nice pendants to hold them, but having an older one makes it more difficult to find one that will fit.
So I decided to make one of my own.
Materials:
I've seen some nice pendants to hold them, but having an older one makes it more difficult to find one that will fit.
So I decided to make one of my own.
Materials:
- Filigree medallion
- Necklace, cord, chain, etc.
- Jump ring
- Needle-nosed pliers
 |
| Metal Filigree Medallion |
I put my Fitbit in the center of the medallion and used the pliers to bend the metal on either side of the Fitbit. Then fold the sides of the medallion so they wrap around the Fitbit, overlapping slightly in the back.
The Fitbit is tapered slightly so that I made sure the top of the pendant was larger than the bottom. Both ends are open and the Fitbit can be slipped into the top and will not fall out of the lower end. I bent the bottom of the medallion just a bit to help keep the Fitbit in place.
The Fitbit is tapered slightly so that I made sure the top of the pendant was larger than the bottom. Both ends are open and the Fitbit can be slipped into the top and will not fall out of the lower end. I bent the bottom of the medallion just a bit to help keep the Fitbit in place.
Add a jump ring to the top of the medallion and put it on the necklace or cord you have selected. And you're done!
 |
| Pendant and Fitbit |
 |
| Front of pendant |
 |
| Underside of the pendant with Fitbit inside |
Monday, November 16, 2015
Handy Owls
My cousin posted a photo on Facebook of a pair of fingerless gloves with owl cables, and I just had to have a pair. There wasn't a link to where the photo came from originally, but the basic pattern looked just like the Au Clair gloves I made recently.
 So I used the Au Clair pattern until I reached the end of the wrist portion (I made the shorter version). Then I added the owl cable while I was working on the thumb gusset. And finished it off in plain stockinette after the last cable twist.


Saturday, July 25, 2015
Teaching Myself Brioche Knitting
I love the way double knitted brioche looks for scarves -- and I have plenty of yarn to practice with. But first I needed to figure out single brioche. Thank goodness for The Brioche Stitch! Lots of pictures, links, and videos to get you going.
Casting on was challenging, I think I'll need to refer to the directions for several projects. But the brioche stitch itself is not that bad. Although I did occasionally lose a yarnover...I could pick it up, but not always successfully. The loftiness of the yarn and the stitch itself does hide some of these errors.

Casting on was challenging, I think I'll need to refer to the directions for several projects. But the brioche stitch itself is not that bad. Although I did occasionally lose a yarnover...I could pick it up, but not always successfully. The loftiness of the yarn and the stitch itself does hide some of these errors.

Friday, June 26, 2015
4th of July Hats
Wanting something festive and patriotic for the 4th of July, so I decided to try out this hat pattern by Mary Jane Mucklestone. Since it was a trial, I used mini-skeins of a fingering yarn - Sprout Seedlings by The Fiber Seed, and knit the pattern as written.
I misread the pattern and thought there were 4 rounds per stripe which looked skimpy, so I did 6 rounds. This resulted in a rather slouchy little hat.

There was enough yarn left to make another hat, so I did, this time *really* following the directions. The second hat is adorable! Well, they both are...
 In conclusion, I think that you could knit an adult-size hat using three of the mini-skeins either by adjusting the pattern or doubling the strands of yarn.
I misread the pattern and thought there were 4 rounds per stripe which looked skimpy, so I did 6 rounds. This resulted in a rather slouchy little hat.

There was enough yarn left to make another hat, so I did, this time *really* following the directions. The second hat is adorable! Well, they both are...

Saturday, June 13, 2015
Mannequin Head Update
So I've started the painting! It turned out that "Parchment" was the skin tone I was looking for - not too pink, not too muddy, pretty pale and neutral. I went with black hair because it's more dramatic and traditionally 1920s. I'm afraid the eyes are still too large, but maybe I can minimize them a bit. So here's the latest:

I will eventually outline her lips and eyes, as well as adding eyelashes and some details.


I will eventually outline her lips and eyes, as well as adding eyelashes and some details.

Tuesday, June 2, 2015
Mannequin Head - continued
Well, the gesso didn't cover the newspaper as well as I wanted, and it has a very matte finish:
So I took a break to think about what to do...I picked out some paint colors and tried them out over the first coat of gesso. Then I put another coat of gesso over the paint. I really wasn't happy with the way the gesso looked, so I decided to try using plain drawing paper over the newspaper and gesso. Because the newspaper had wrinkled and hadn't been very smooth, I decided to dampen the drawing paper so it would cover the features more evenly.
The wet paper went over the form very well, and didn't need any glue or Mod Podge to stick. I wanted to put a coat of Mod Podge over the paper, but needed to wait until the paper dried. After it dried, some of the paper peeled up a bit, so the Mod Podge was necessary as well as decorative. Now I'll start the painting process and finish with another coat of Mod Podge to seal it.
 |
| One coat of gesso |
 |
| My painting test shows through |
Saturday, May 30, 2015
Chevron Cowl
I picked up several skeins of DK yarn in various places, and strangely, they are all blue! Or maybe that's not really so strange...
They range from 140 yards to 230 yards, so I was looking for some one-skein patterns to show off the yarns. After looking at some hat and cowl patterns, and chevron patterns, I found Zig from The Neighborhood Yarn Co. It used almost exactly the same number of yards as 3 skeins I had of DK weight yarn in similar textures. I had two other yarns, but their textures (twist, etc.) were not a good match.
The yarns:
The stitch pattern in the cowl alternates between stockinette stitch and garter stitch, sometimes one of each in the same color...so I came up with this recipe:
A: 20 rows GC, then 20 rows StC
C: 20 rows GC
B: 20 rows StC, then 20 rows GC
A: 20 rows StC, then 20 rows GC
C: 20 rows StC
B: 20 rows GC, then 20 rows StC
A: 20 rows GC, then 20 rows StC
C: 20 rows GC
B: 20 rows StC, then 20 rows GC
A: 20 rows StC, then 20 rows GC
C: 20 rows StC
B: 20 rows GC, then 20 rows StC
:
continued until the cowl is approximately 49" long.

They range from 140 yards to 230 yards, so I was looking for some one-skein patterns to show off the yarns. After looking at some hat and cowl patterns, and chevron patterns, I found Zig from The Neighborhood Yarn Co. It used almost exactly the same number of yards as 3 skeins I had of DK weight yarn in similar textures. I had two other yarns, but their textures (twist, etc.) were not a good match.
The yarns:
- A = 2 Guys Yarn Company MCN DK (merino, cashmere, nylon) - 230 yards in Across the Bay
- B = Polka Dot Sheep Stumptown DK (100% merino) - 231 yards in Nightfall
- C = Swans Island Organic Washable DK (100% merino) - 140 yards in Verdigris
The stitch pattern in the cowl alternates between stockinette stitch and garter stitch, sometimes one of each in the same color...so I came up with this recipe:
A: 20 rows GC, then 20 rows StC
C: 20 rows GC
B: 20 rows StC, then 20 rows GC
A: 20 rows StC, then 20 rows GC
C: 20 rows StC
B: 20 rows GC, then 20 rows StC
A: 20 rows GC, then 20 rows StC
C: 20 rows GC
B: 20 rows StC, then 20 rows GC
A: 20 rows StC, then 20 rows GC
C: 20 rows StC
B: 20 rows GC, then 20 rows StC
:
continued until the cowl is approximately 49" long.

Thursday, May 28, 2015
Chevrons
I always seem to have problems with chevrons...First, I made the Lila Cowl with the lovely cashmere collection from Pepperberry Knits. I loved the color selection for this cowl and the pattern - but it was the packaging that sold me.
I followed the directions, but found I needed to knit 5 stitches between increases and decreases. It all worked out in the end.

Now, I've started the Zig Cowl using a selection of DK yarns from Stitches West 2015 and my trip to Mendocino last year. While I still needed to use a provisional cast on and I'll need to kitchener at the end, this is a flat cowl. I ran into trouble because knitting 12 stitches between the decreases didn't work out...if I stick with the 72 stitches I cast on (and I will because what a pain to change that!), I need to change 12 to 10. Now I'm making some headway.
* I see on the Ravelry page for the Zig pattern that they have corrected it to cast on 82 stitches. But I feel that 72 stitches is wide enough.
 |
| 8 colors on a binder ring with the pattern |
I followed the directions, but found I needed to knit 5 stitches between increases and decreases. It all worked out in the end.
Now, I've started the Zig Cowl using a selection of DK yarns from Stitches West 2015 and my trip to Mendocino last year. While I still needed to use a provisional cast on and I'll need to kitchener at the end, this is a flat cowl. I ran into trouble because knitting 12 stitches between the decreases didn't work out...if I stick with the 72 stitches I cast on (and I will because what a pain to change that!), I need to change 12 to 10. Now I'm making some headway.
* I see on the Ravelry page for the Zig pattern that they have corrected it to cast on 82 stitches. But I feel that 72 stitches is wide enough.
Friday, May 22, 2015
Mannequin Head
For some reason, I got the idea that I need a model for my knit hat photos. I took a look on Pinterest, and decided to customize a styrofoam head. I'm sure I could find one locally, perhaps even at Michaels, but I ordered one from Amazon along with some other things. Issue: Although the head was packed with air cushions, the nose got flattened a bit. This is okay because I was going to cover it with paper for a better paint surface so I'll build the nose up again.
Here's the original (scary) head:
 Here's the head with it's newspaper coating:
 Here's the head with some features to check for size and positioning:

I plan on putting a coat of gesso over the newspaper, so the features will get covered up again. I think the eyes might need to be a bit smaller. I'll also need to figure out the hairline. Should I add some texture for the hair? Should I add the suggestion of ears?
Here's the original (scary) head:


I plan on putting a coat of gesso over the newspaper, so the features will get covered up again. I think the eyes might need to be a bit smaller. I'll also need to figure out the hairline. Should I add some texture for the hair? Should I add the suggestion of ears?
Saturday, May 16, 2015
Bottle Glasses
I've been toying with the idea of making drinking glasses from wine bottles for awhile. I saw a tool at MakerFaire two years ago that would make it easier to make them, and got it as a gift last year. And I've been collecting wine bottles (and friends have, too) so maybe the time has come.
On a trip to Summerwood Winery in Paso Robles, I got to see a few of these tumblers up close. Some had flat bottoms, some had punts. Both were very nice - although I suspect they used some kind of flame to finish the drinking edge.
I'll do some research to determine whether to use Bordeaux or Burgundy bottles and how much of the bottle to use. The Refresh site provides some clues as to the sizes. The Bordeaux is nice and straight up to the shoulders:
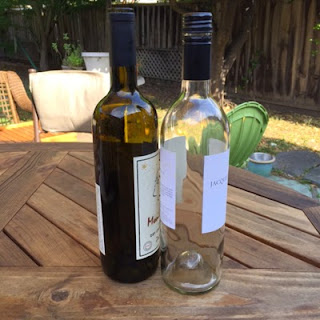
But I don't know if the Burgundy really has any less usable height:

I guess I'll just have to measure the height and circumference.
 |
| Ephrem's Bottle Cutter |
On a trip to Summerwood Winery in Paso Robles, I got to see a few of these tumblers up close. Some had flat bottoms, some had punts. Both were very nice - although I suspect they used some kind of flame to finish the drinking edge.
 |
| Refresh Glasses |

But I don't know if the Burgundy really has any less usable height:

I guess I'll just have to measure the height and circumference.
Wednesday, April 1, 2015
Green & Gold - Further Adventures in Planned Pooling
So, I've started another scarf - this time in the Oakland A's colors. I wanted to make a slightly wider and shorter scarf than the last one, so I experimented with more than 50 stitches. I thought I might be able to force vertical stripes, so I started in the middle of a green section with 52 stitches.

But instead I got what the pooling planner predicted I would get if I started at the beginning of a yellow section. The good news is that the pattern is remarkable uniform.


But instead I got what the pooling planner predicted I would get if I started at the beginning of a yellow section. The good news is that the pattern is remarkable uniform.
Friday, March 13, 2015
Pooling Update
Well, I wasn't happy with the way the pattern was going, so I measured the color runs on the second skein and tried again. Here's the Planned Pooling calculation for that skein:
 So I cast on and started knitting:

I liked that much better, so I did more calculations on the first skein, and found that 46 stitches worked well with it, too, so I'll start over again.
As I'm going along, the pattern is changing because the color segments aren't equal throughout each skein. But I'm hoping that the variation will just add interest to the finished scarf. Otherwise, I'll have to change the project entirely. Hitchhiker and Trillian are two options, especially since there are good examples of what the sports teams colors look like in those patterns.
I liked that much better, so I did more calculations on the first skein, and found that 46 stitches worked well with it, too, so I'll start over again.

Wednesday, March 11, 2015
It's not as easy as it looks...
Well, the pooling/patterning is getting out of control again. The segments of color aren't exactly 54/47 stitches, and it was okay for awhile but now it looks weird to me. Do I keep going? Or should I try it again with the second skein?
It seems like the color segments don't stay the same length throughout the skein, and now they are about equal. That makes the piece stripe one row each color. Argh!

It seems like the color segments don't stay the same length throughout the skein, and now they are about equal. That makes the piece stripe one row each color. Argh!
Friday, March 6, 2015
Getting Your Pooling to Behave
It’s all about where you start. On my first attempt, I cast on at the start of the orange and it
didn’t create the pattern I expected. But I used this first try to
determine the number of stitches in a black section (47) and the number of
stitches in an orange section (54).
I used plannedpooling.com to figure out the right number of stitches to cast on but you have to start knitting where the colors begin. If you’re off by even a little bit, the pooling won’t work. Then I used a long tail cast on to ensure I would start knitting at the beginning of a black section.
 |
| 48 stitches on US 4 needles, cast on at beginning of orange |
I used plannedpooling.com to figure out the right number of stitches to cast on but you have to start knitting where the colors begin. If you’re off by even a little bit, the pooling won’t work. Then I used a long tail cast on to ensure I would start knitting at the beginning of a black section.
- Determine the number of stitches in each color section.
- Use a long-tail cast on to ensure you start in the right place.
- Use plannedpooling.com to play around with the possibilities.
 |
| 48 stitches on US 5, long tail cast on to beginning of black |
Some of the difference can be attributed to changing the needle size, but it's mostly about whether you start the cast on at the beginning of a color or whether you start knitting at the beginning of a color.
Thursday, March 5, 2015
And another project is wrapping up...
I started this cowl on February 13th and worked on it pretty steadily. It went quickly since it's just simple stockinette in the round. Two rows of the solid gray, then two rows of the ombre - repeat these four rows until nearly all the ombre is gone. One last row of ombre and then graft. Okay, yes, I still need to graft the ends together...but that's 84 stitches in the round.

Wednesday, March 4, 2015
How long does it take to block a project?
Well, it's finally complete! Blocking really helped make each section more uniform. I pleased with the way it turned out, but I wish it was a bit longer.

Subscribe to:
Posts (Atom)


